Summer is flying by! I can't believe August is half over. There have been some big changes in our house that have kept us very busy. Fiance' J and I are doubling our efforts to get fit and build a sustainable, healthy lifestyle. We have 379 days until our wedding and are having fun with all our planning and designing!
I have officially left the corporate world and have never been happier. Thanks to all of you wonderful readers (and Facebook friends and Pinterest followers...) I have been getting quilt orders! I have sold 2 quilts that were posted here and have taken on another custom order. Building a business has been a slow but very worthwhile venture. I am most grateful but please keep the orders coming! If you have something in mind, let's talk and make it happen!
Alright, enough of the business end.
It was suggested to me that I should post tutorials of techniques or tricks that correspond with current projects. For my most recent project, I had to make a lot of flying geese blocks. I am all about conserving fabric, not giving up any waste unless I absolutely have to, and getting the small building blocks done quick enough that I can move on to the more interest parts of piecing. Enter the 4-from-1 Flying Geese Technique!

4-From-1 Flying Geese
Supplies:
- 1 large block - this will be the "goose" fabric, size to come
- 4 small blocks - these will be the sky fabric, size to come
- Ruler
- Ball point pen
- Sewing machine
- Scissors
- Iron
- Magic Formulas:
Small Block = Smallest Finished Block Size Measurement + 7/8"

My finished block (meaning the space it will take on the quilt top, no seam allowances included) is 2" by 4". So my large block/blue goose fabric is 4" + 1 1/4" = 5 1/4" square. My small blocks/white sky fabric are 2" + 7/8" = 2 7/8" square.
Mark your seam lines
 |
| The blue line is the center line. The black lines are the 1/4" seam lines. |
Align blocks and sew
 |
| Insert shameless flash of my gorgeous engagement ring - love that Fiance J!! |
I am not much of a pinner when it comes to quilt piecing, so please don't be alarmed when you see me skip over that part. If you want or need to pin, this is when you would do so.
Sew on those 1/4" lines.
Cut down the middle on the center line.

Iron

Add 2nd sky blocks

Cut down the center line.

4 Beautiful Flying Geese!

See! All done!
It is always a good idea to trim you blocks to the exact size you need for piecing later. I tend to trim everything before moving on to the next step. It makes for easier assembly later on and your quilt tops will come out squarer, which either you or your long-arm quilter will DEFINITELY thank you for! :-)

And that's it! These are our 4 flying geese units, cut from the same block, beautifully ironed and assembled and ready for your next project! Way to go!!
Or if you don't want to assemble them in any sort of order, then don't! I'm always a fan of thinking outside the box and away from the traditional form. With all the flying geese that came from the 4-from-1 method, I made a modern little baby quilt:
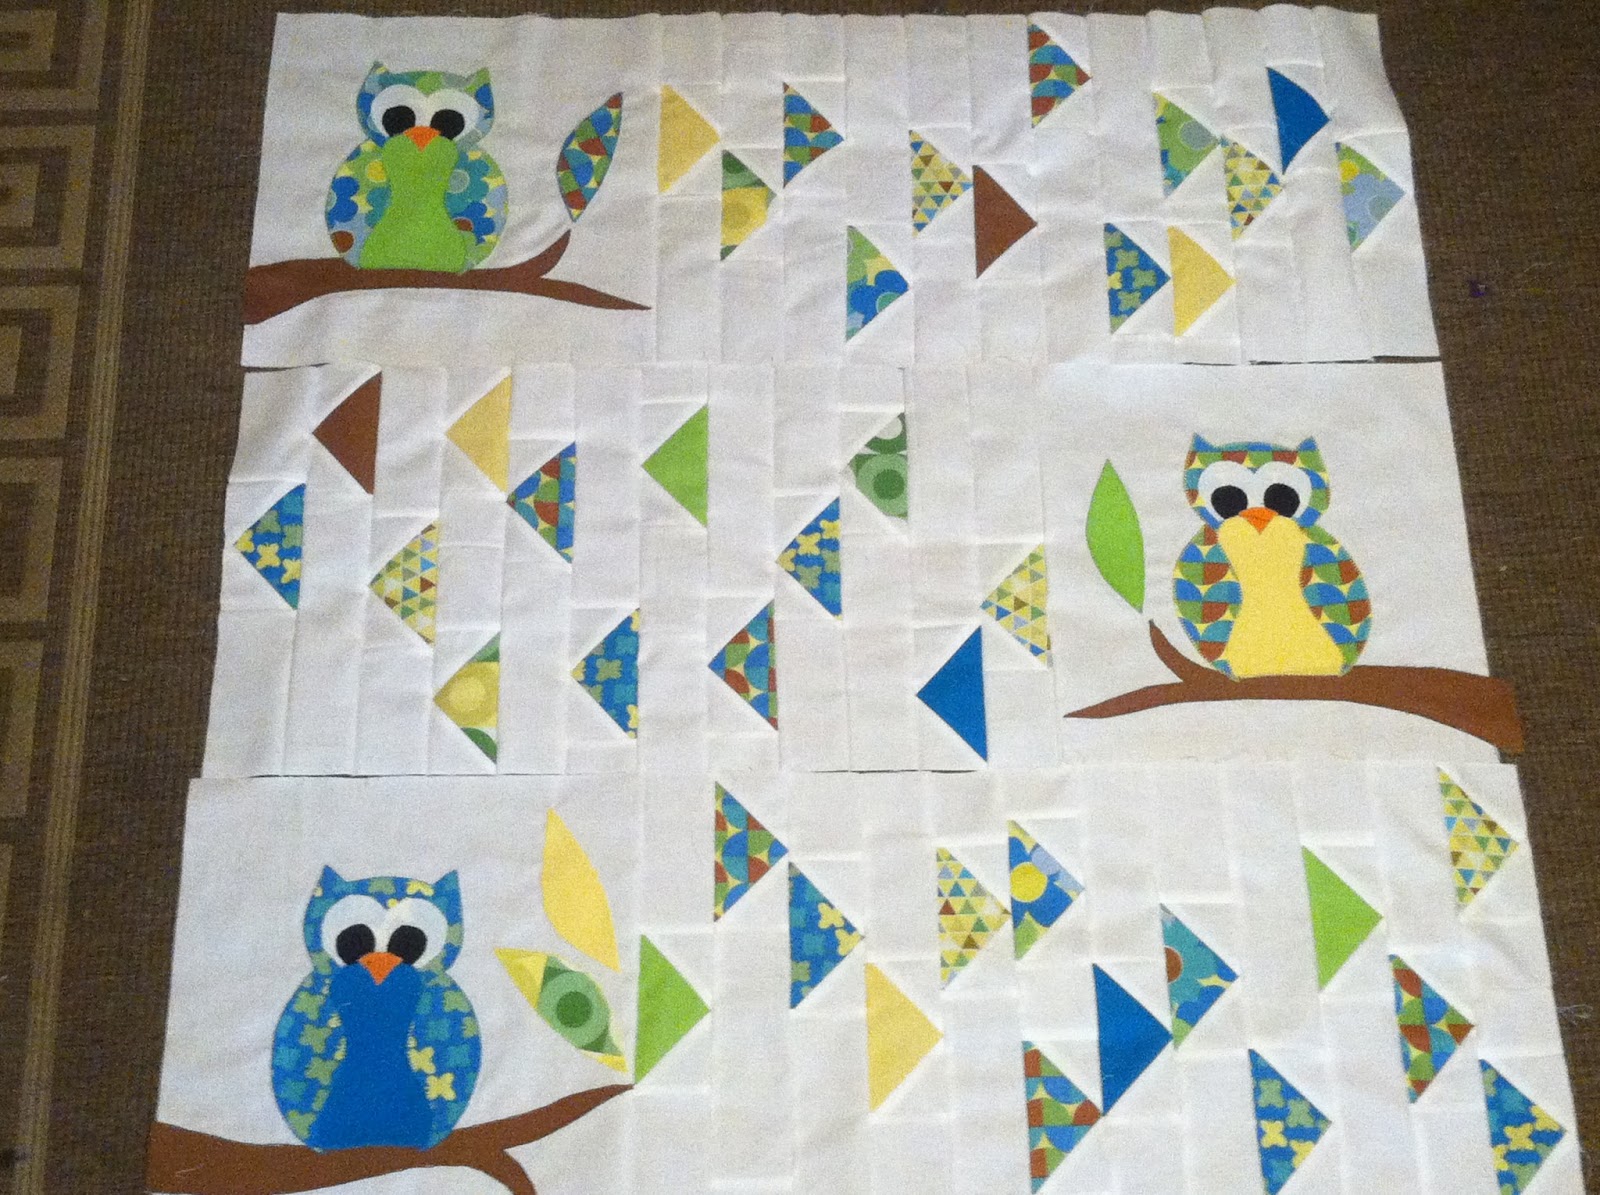 |
| "Baby Birds," an original design still under construction. |
Thanks for tuning in today and for all your wonderful support!! Enjoy your weekend and check back soon. A sneak peek for the next post is just below!
Cheers!!
 |
| Coming Attractions...! |
Music: "All Nightmare Long" by Metallica
No comments:
Post a Comment